Drawing a vacuum cleaner cartoon might seem tricky when you first start. Many people find it hard to get the shape just right or make it look fun. But don’t worry, it’s actually much simpler than it looks! We’ll break it down into easy steps so you can draw your own cool vacuum cleaner characters. You’ll learn just how fun and easy it can be. Let’s get drawing!
Key Takeaways
- Learn the basic shapes to start drawing any vacuum cleaner cartoon.
- Discover simple ways to add personality to your cartoon vacuum cleaner.
- Understand how to draw different parts like hoses and wheels with ease.
- Get tips on coloring and shading to make your drawings pop.
- See how to create a simple vacuum cleaner cartoon scene.
Getting Started with Vacuum Cleaner Cartoon Shapes
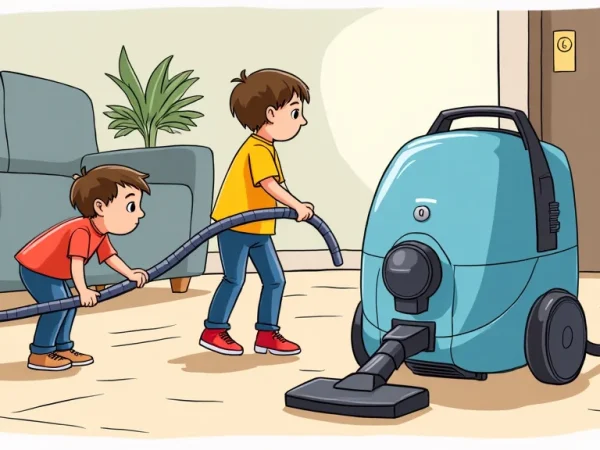
To begin drawing any vacuum cleaner cartoon, focus on the main shapes. Most vacuum cleaners have a body, a hose, and sometimes a dust bag. For a standing vacuum, the body is often a rectangle or a rounded box. Think of it like a tall, sturdy container. You can add curves to make it softer and friendlier. This main shape is the foundation for your entire drawing.
The hose is like a flexible snake that connects to the main body. It’s usually drawn as a series of connected circles or ovals, or a wavy line. Don’t worry about making it perfect; a little bend makes it look more dynamic. The handle, where you hold it, is often a curved shape on top. Wheels are usually simple circles at the bottom, helping it move around.
Here are some simple shape ideas:
- Main Body: Use a rounded rectangle or an oval. This is the biggest part of your vacuum cleaner.
- Hose: Draw a wavy line or a string of connected circles. It needs to look flexible.
- Handle: Add a curved line or a small handle shape on top of the body.
- Wheels: Draw two to four small circles at the bottom.
Explaining these shapes helps beginners visualize the core elements. A rounded rectangle is easy to draw, and adding curves makes it look less rigid. The hose’s flexibility is key to making it look like it can reach things. Simple circles for wheels are straightforward.
Adding Personality to Your Vacuum Cleaner Cartoon
Once you have the basic shapes, you can give your vacuum cleaner cartoon a lot of personality. Think about what kind of character you want it to be. Is it happy and energetic, or a bit grumpy and slow? You can show this through its eyes, mouth, and even how its hose is positioned.
Eyes are very important. You can draw them as simple dots, big circles, or even expressive ovals. Placing them higher on the body can make it look surprised, while placing them lower might make it seem a little sad or thoughtful. A big smile can make it look friendly, while a straight line for a mouth might make it look serious.
The hose can also show emotion. A hose that’s sticking straight up might look like it’s curious or excited. A hose that’s slumped down could suggest it’s tired or a bit sad. Even the dust bag, if your cartoon has one, can be shaped to look like a grumpy face or a full, happy pouch.
Here are ways to add personality:
- Eyes: Draw different shapes for eyes like dots, circles, or ovals.
- Mouth: Use lines or curves to create a smile, frown, or neutral expression.
- Body Shape: Rounder shapes often feel friendlier than sharp, square ones.
A good example of adding personality is to think about famous cartoon characters. A character like Mickey Mouse uses simple shapes and expressive eyes to show his feelings. You can do the same with your vacuum cleaner. A vacuum with big, round eyes and a wide smile will feel very different from one with small, squinty eyes and a straight line for a mouth.
Drawing the Different Parts of a Vacuum Cleaner Cartoon
Let’s look closer at drawing the parts that make a vacuum cleaner work. The hose and the nozzle are where the action happens in a vacuum cleaner cartoon. The nozzle is the part that sucks up dirt. It’s usually at the end of the hose or attached directly to the body.
For the nozzle, you can draw a wide opening, like a mouth, or a smaller, more focused shape. Think about what it’s meant to do – suck things up! So, making the opening look a bit hungry can be fun. You can draw little lines or swirls inside to show it’s working.
The wheels are also fun to draw. Most vacuum cleaners have two main wheels at the back and sometimes smaller ones at the front. You can draw them as simple circles. Adding a bit of a shadow underneath can make them look like they are actually on the ground. Sometimes, making one wheel slightly turned can show movement.
Here are details for drawing parts:
- Hose Detail: You can draw the hose with lines that show it bending.
- Nozzle Shape: Make the nozzle look like an opening that can suck things in.
- Wheel Motion: Draw wheels slightly angled to show movement or speed.
Consider a vacuum cleaner that’s cleaning up a mess. The hose might be stretched out, reaching for a stray crumb. The nozzle would be right up against the floor, looking determined. The wheels might be spinning quickly if it’s a powerful vacuum.
Coloring and Shading Your Vacuum Cleaner Cartoon
Coloring is where your vacuum cleaner cartoon truly comes to life. Think about the mood you want to create. Bright, cheerful colors like red, yellow, or blue can make your vacuum look energetic and fun. Muted colors like gray or brown might make it seem more serious or industrial.
For shading, you don’t need to be an expert. Simple shading adds depth and makes your drawing look more real, even in a cartoon style. Imagine a light source, like a sun or a lamp. Shade the side of your vacuum cleaner that’s away from the light. This will create shadows and highlight the parts closer to the light.
You can use a darker shade of the same color for shading. For example, if your vacuum is blue, use a darker blue for the shaded areas. Adding a slight gray tone can also work well. Don’t overthink it; even a few simple shaded areas can make a big difference.
Tips for coloring and shading:
- Color Choice: Pick colors that match the personality you want to give your vacuum.
- Light Source: Decide where your light is coming from and shade the opposite side.
- Depth with Color: Darker shades make parts look further away.
Let’s imagine a scene where a bright red vacuum cleaner is happily cleaning a room. The sunlight is coming from a window on one side. The side of the vacuum away from the window would be shaded a darker red or with a touch of purple. The wheels might have a gray shadow underneath them to show they are touching the floor.
Creating a Simple Vacuum Cleaner Cartoon Scene
Once you’re happy with your vacuum cleaner character, you can put it into a scene. This makes your drawing tell a story. Think about where your vacuum cleaner lives or what it does. Does it clean a messy room, or is it resting in a closet?
A simple background can make a big difference. You don’t need to draw a whole house. Just a few lines to suggest a floor and a wall can be enough. If your vacuum is cleaning, you could draw a few scattered toys or some dust bunnies for it to “eat.”
You can also add other characters. Maybe there’s a small pet watching the vacuum cleaner, or a child happily playing nearby. This adds more life and interest to your cartoon. The interaction between characters makes the scene more engaging.
Here’s how to build a scene:
- Setting: Draw a simple floor and wall to indicate a room.
- Action: Show your vacuum cleaner doing something, like cleaning up dust.
- Context: Add a few small details like toys or a pet to make it interesting.
A common scenario might be a small, friendly vacuum cleaner tidying up a playroom. It could be shown with its hose stretched towards a pile of colorful toy blocks. The background might just be a simple, light-colored wall with a hint of a wooden floor. This simple setup immediately tells a story of a helpful cleaner.
How Cartoon Vacuum Cleaners Work
Understanding the basic mechanics of how a vacuum cleaner cartoon “works” helps in drawing it realistically, even with a playful twist. In reality, a vacuum cleaner uses an electric motor to create suction. This suction pulls air and debris into the machine. For a cartoon, we don’t need to explain the motor in detail, but we can show its effect.
The suction is the key action. You can represent this visually. When the vacuum is working, you can draw little lines or swirls of dust and debris moving towards the nozzle. This shows the air being pulled in. The hose is the pathway for this debris.
Sometimes, cartoons exaggerate the cleaning power. A vacuum might suck up things it shouldn’t, like a pet’s tail or a whole sock. This is where the fun comes in. You can draw the hose looking stretched and strained as it pulls in something large. The vacuum body might even wobble from the effort.
Drawing Different Types of Vacuum Cleaner Cartoons
Not all vacuum cleaners look the same, and this variety can inspire your cartoons. There are upright vacuums, canister vacuums, and even handheld ones. Each type has a distinct shape that can be fun to draw.
Upright vacuums are tall and have the motor and bag or bin in a single unit. Their shape is often like a sturdy rectangle with a handle. They are usually easy to animate because they stand on their own.
Canister vacuums have a main body (the canister) on wheels and a separate hose with a cleaning head. This design offers more dynamic possibilities. The canister can roll around, and the hose can reach into different places, allowing for more varied poses and actions.
Handheld vacuums are small and portable. They are great for quick cleanups and can be drawn as very compact characters. Their size makes them good for characters who might interact with smaller objects or have a more agile feel.
Here’s a comparison of common types:
| Type | Key Features | Cartoon Potential |
|---|---|---|
| Upright | Tall, integrated body, easy to stand | Sturdy, reliable character |
| Canister | Separate body and hose, flexible reach | Maneuverable, versatile actions |
| Handheld | Small, portable, no hose | Quick, agile, good for detail work |
A canister vacuum cartoon could be shown chasing a runaway dust bunny across a large floor. Its long hose might stretch out like a tentacle, or its canister might zip around corners. An upright vacuum might be drawn as a more stoic character, diligently cleaning in a straight line.
Visualizing the Vacuum Cleaner’s “Dust Bag” or Bin
The dust bag or bin is where all the collected dirt goes. In a cartoon, this can be a great place to add humor or show how much work the vacuum is doing. You can draw it as a simple bag attached to the side or a clear plastic bin on top.
If it’s a bag, you can draw it looking puffy and full as it collects dirt. When it’s emptied, it can look small and flat again. A clear bin is even better for visual gags. You can draw the dirt piling up inside, maybe with little faces of the dust bunnies looking scared or annoyed.
When the bin is full, the vacuum cleaner might start to complain or slow down. This is a common trope in cartoons to show the limitations of the machine. You can draw the bin overflowing, with dust spilling out, to show it’s had enough.
Common Myths Debunked
Myth 1: Drawing a vacuum cleaner cartoon is too complicated for beginners.
This is not true. By breaking down the vacuum cleaner into simple shapes like rectangles, circles, and wavy lines, beginners can easily construct the basic form. Adding personality through eyes and mouths is also straightforward.
The key is to start simple and build up.
Myth 2: Cartoons always need perfect, clean lines.
In cartooning, especially for characters like a vacuum cleaner, slightly imperfect or wobbly lines can actually add charm and a sense of hand-drawn appeal. The focus is more on expression and character than technical perfection. Think of friendly, imperfect lines as adding to the character’s vibe.
Myth 3: Shading is only for professional artists.
Anyone can add simple shading to give a drawing depth. You just need to pick a light source and darken the opposite side. This is a basic technique that greatly improves the look of any drawing, including a vacuum cleaner cartoon.
It helps the object appear less flat.
Myth 4: You need special drawing tools to draw cartoons.
You can create a fantastic vacuum cleaner cartoon with just a pencil and paper. Digital tools can offer more options, but they are not necessary to learn the fundamentals. The creativity comes from your ideas, not the tools you use.
Frequently Asked Questions
Question: What is the best way to start drawing a vacuum cleaner cartoon?
Answer: Start by sketching out the main body shape, which is often a rounded rectangle or an oval. Then, add the hose, handle, and wheels using simple lines and circles.
Question: How can I make my vacuum cleaner cartoon look unique?
Answer: Give it a distinct personality with expressive eyes, a mouth, and unique body details. You can also experiment with different colors and accessories.
Question: Should I draw a specific brand of vacuum cleaner?
Answer: No, it’s better to create your own unique design. This allows for more creative freedom and makes your cartoon character stand out.
Question: How do I draw the suction effect?
Answer: Draw swirling lines or small particles moving towards the vacuum’s nozzle. This visually represents the suction power.
Question: Can I draw a vacuum cleaner cartoon for a story?
Answer: Absolutely! A vacuum cleaner can be a great character in a story, perhaps as a helpful robot or a clumsy friend. Just give it a personality and a role.
Conclusion
Drawing a vacuum cleaner cartoon is a fun way to practice your art skills. You can create characters with personality using simple shapes. Adding details like expressive eyes and a working hose brings them to life. Experiment with different types and colors. Soon, you’ll be drawing all sorts of vacuum cleaner friends to make your art pop.